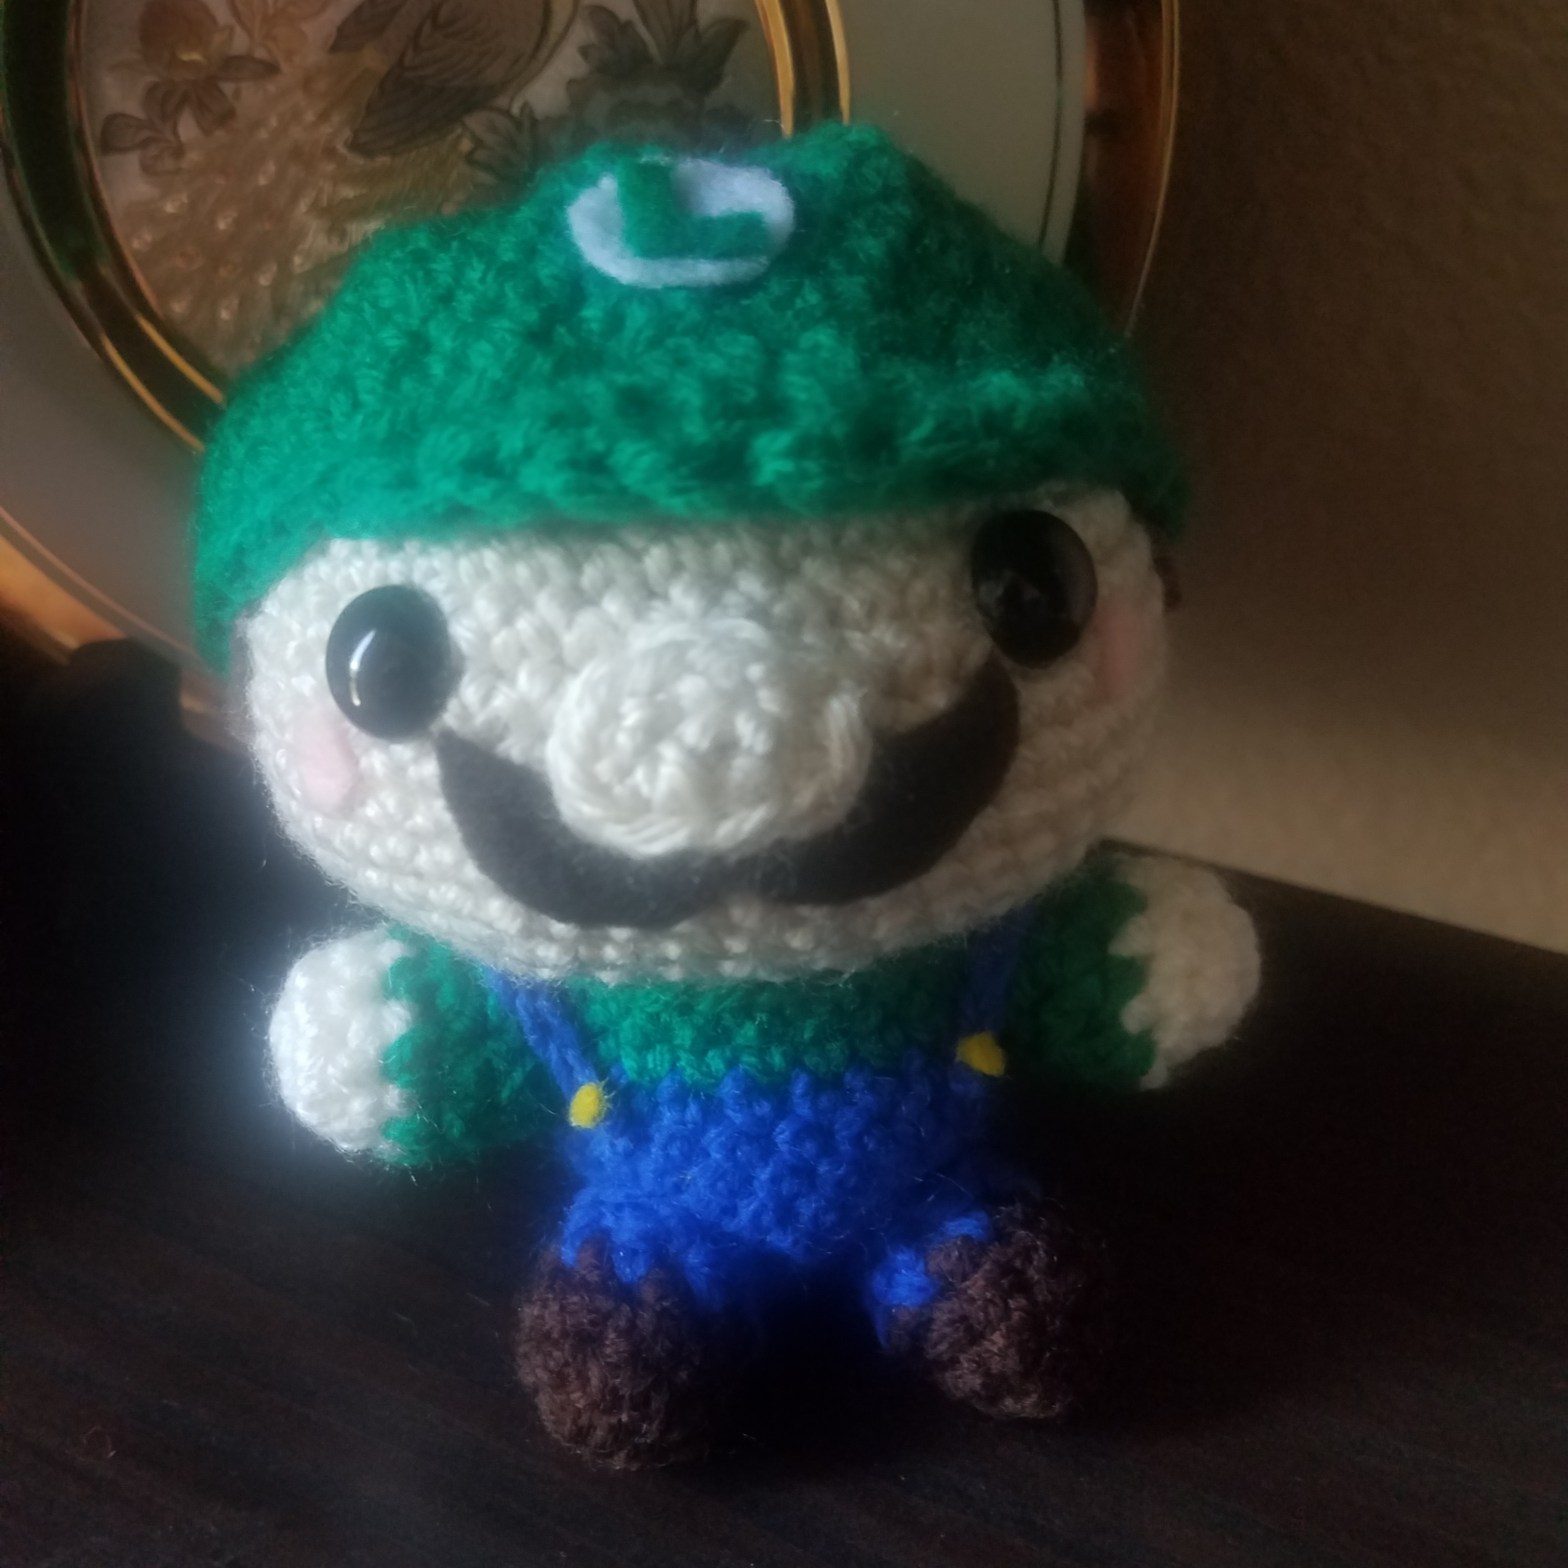
Phew, another week down! This week its Luigi, and I used the same pattern I made for Mario.
Once again, felt is awesome for small details and complex shapes, like the little yellow buttons for Luigi’s overalls, or his mustache!
The next character is Diddy Kong!
This event is a CAL/weekly challenge, so if anyone wants to join in and create your own version of Diddy Kong for next Saturday you are more than welcome to! Use #supersmashtokyo to share your projects and tag me on Instagram @tokyodragon.crochet
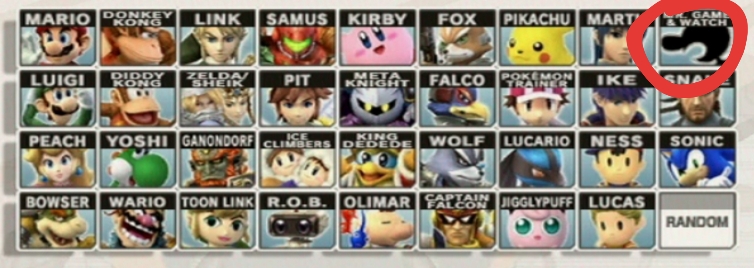
This week it’s Mr. Game & Watch! It was certainly something new for me, and a bit of a challenge, but I think it worked out somehow.
Next up on the roster is Luigi!
This event is a CAL/weekly challenge, so if anyone wants to join in and create your own version of Luigi for next Saturday you are more than welcome to! Use #supersmashtokyo to share your projects and tag me on Instagram @tokyodragon.crochet
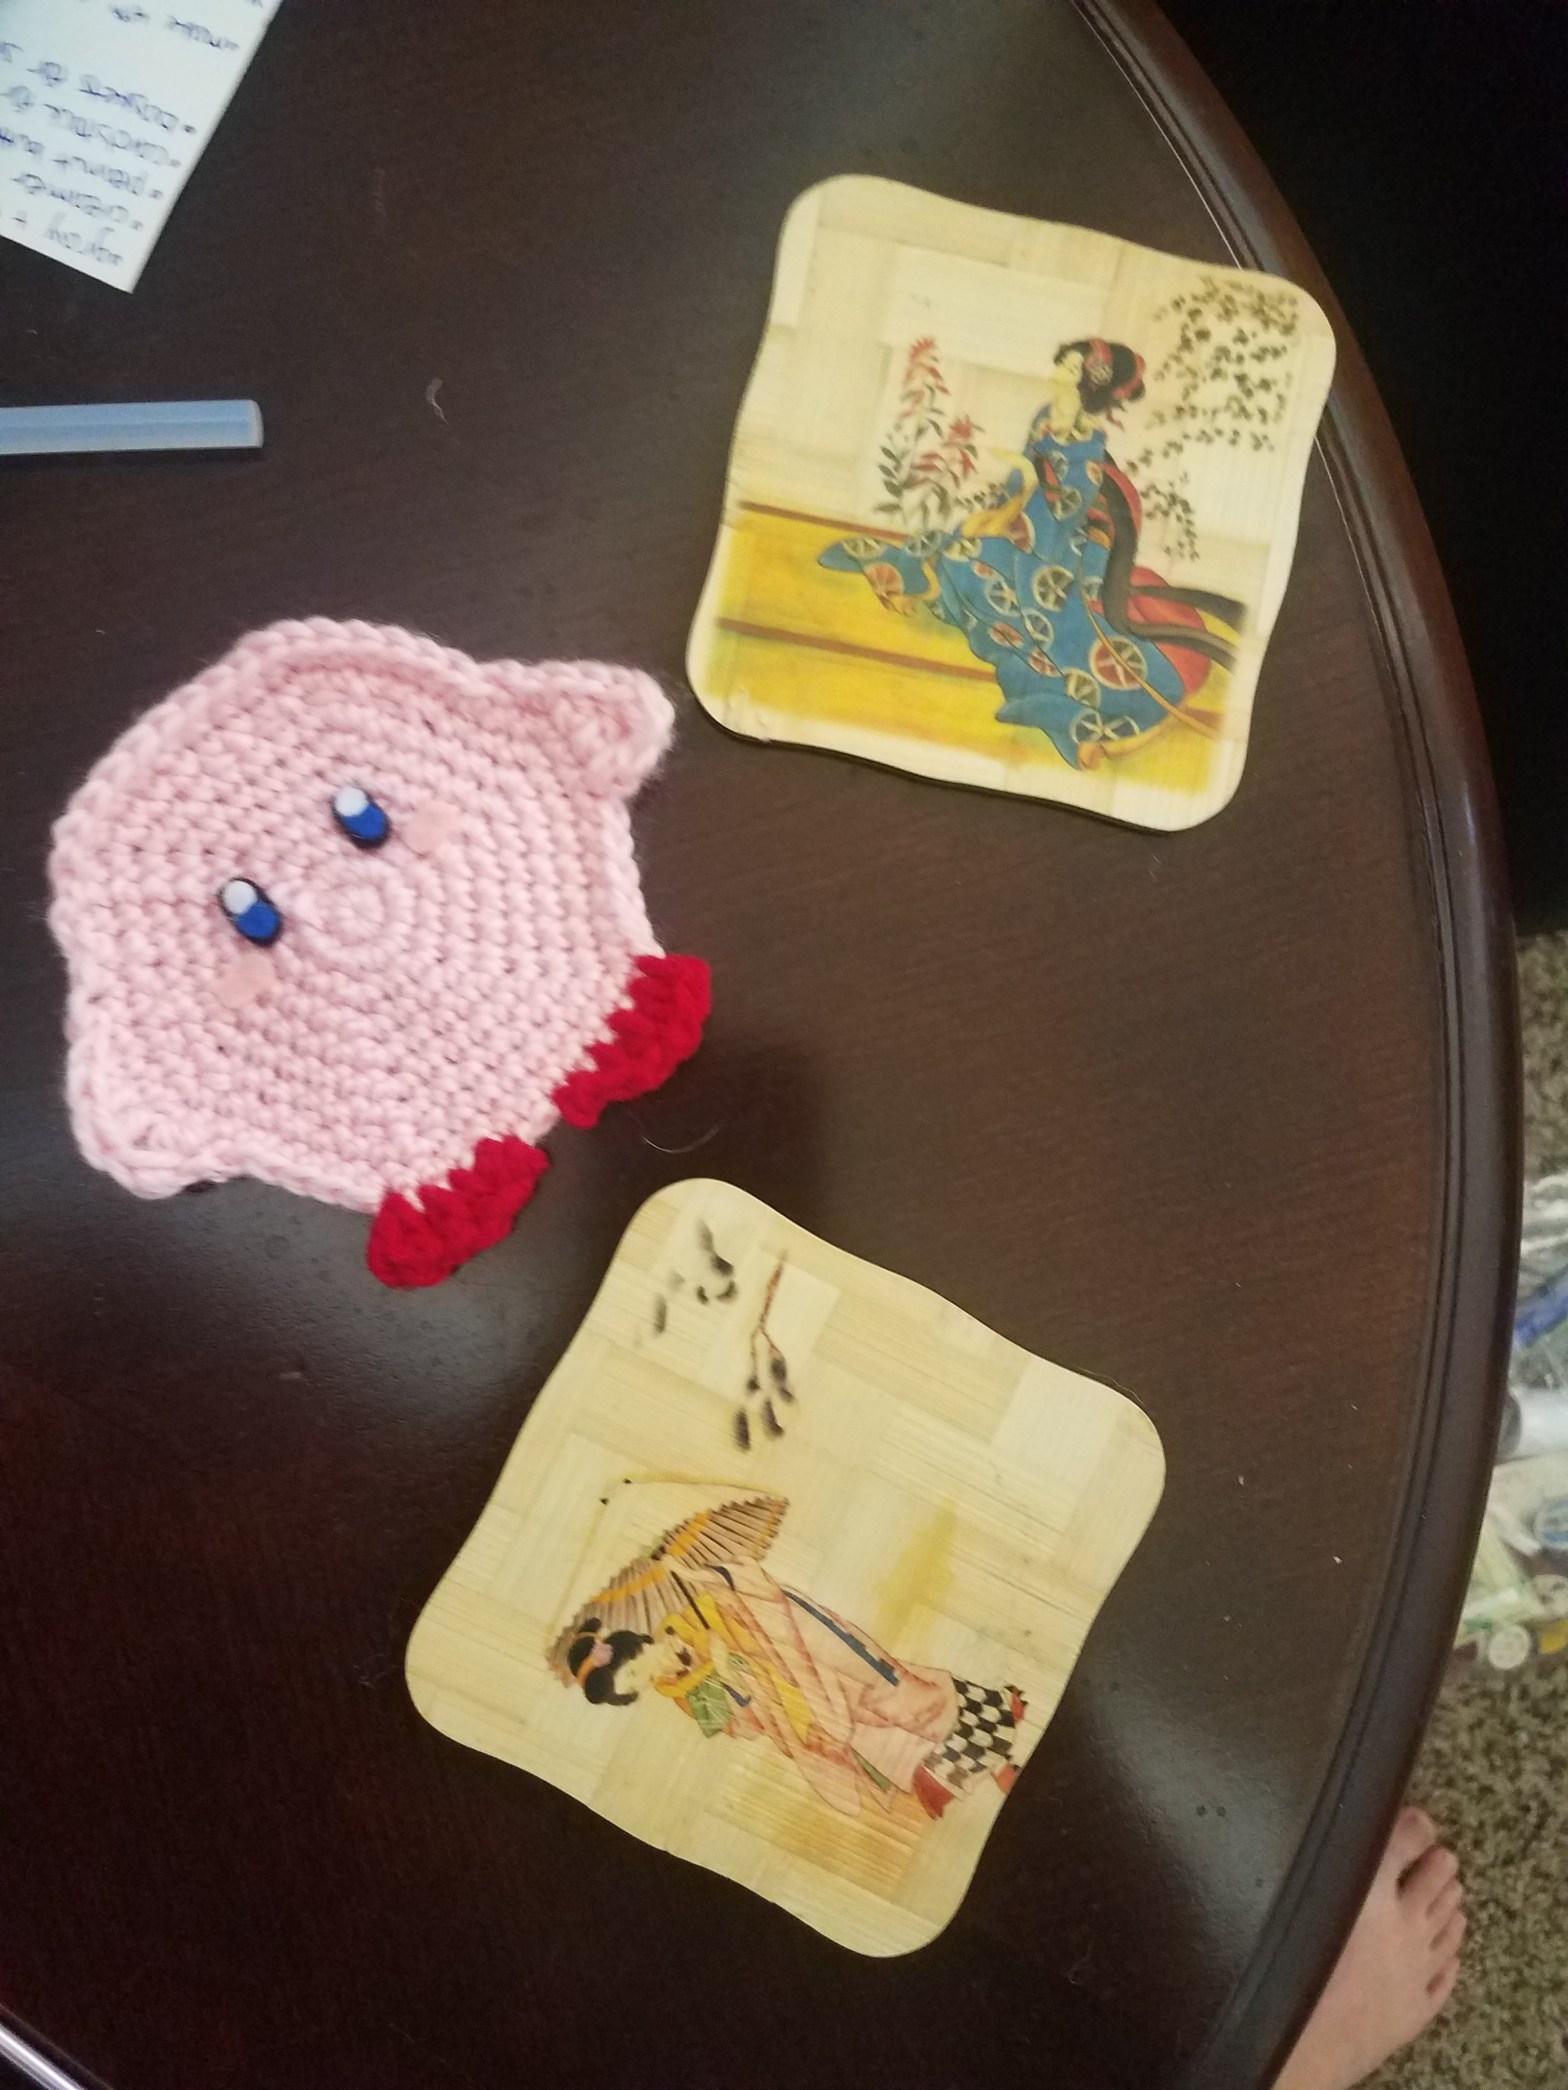
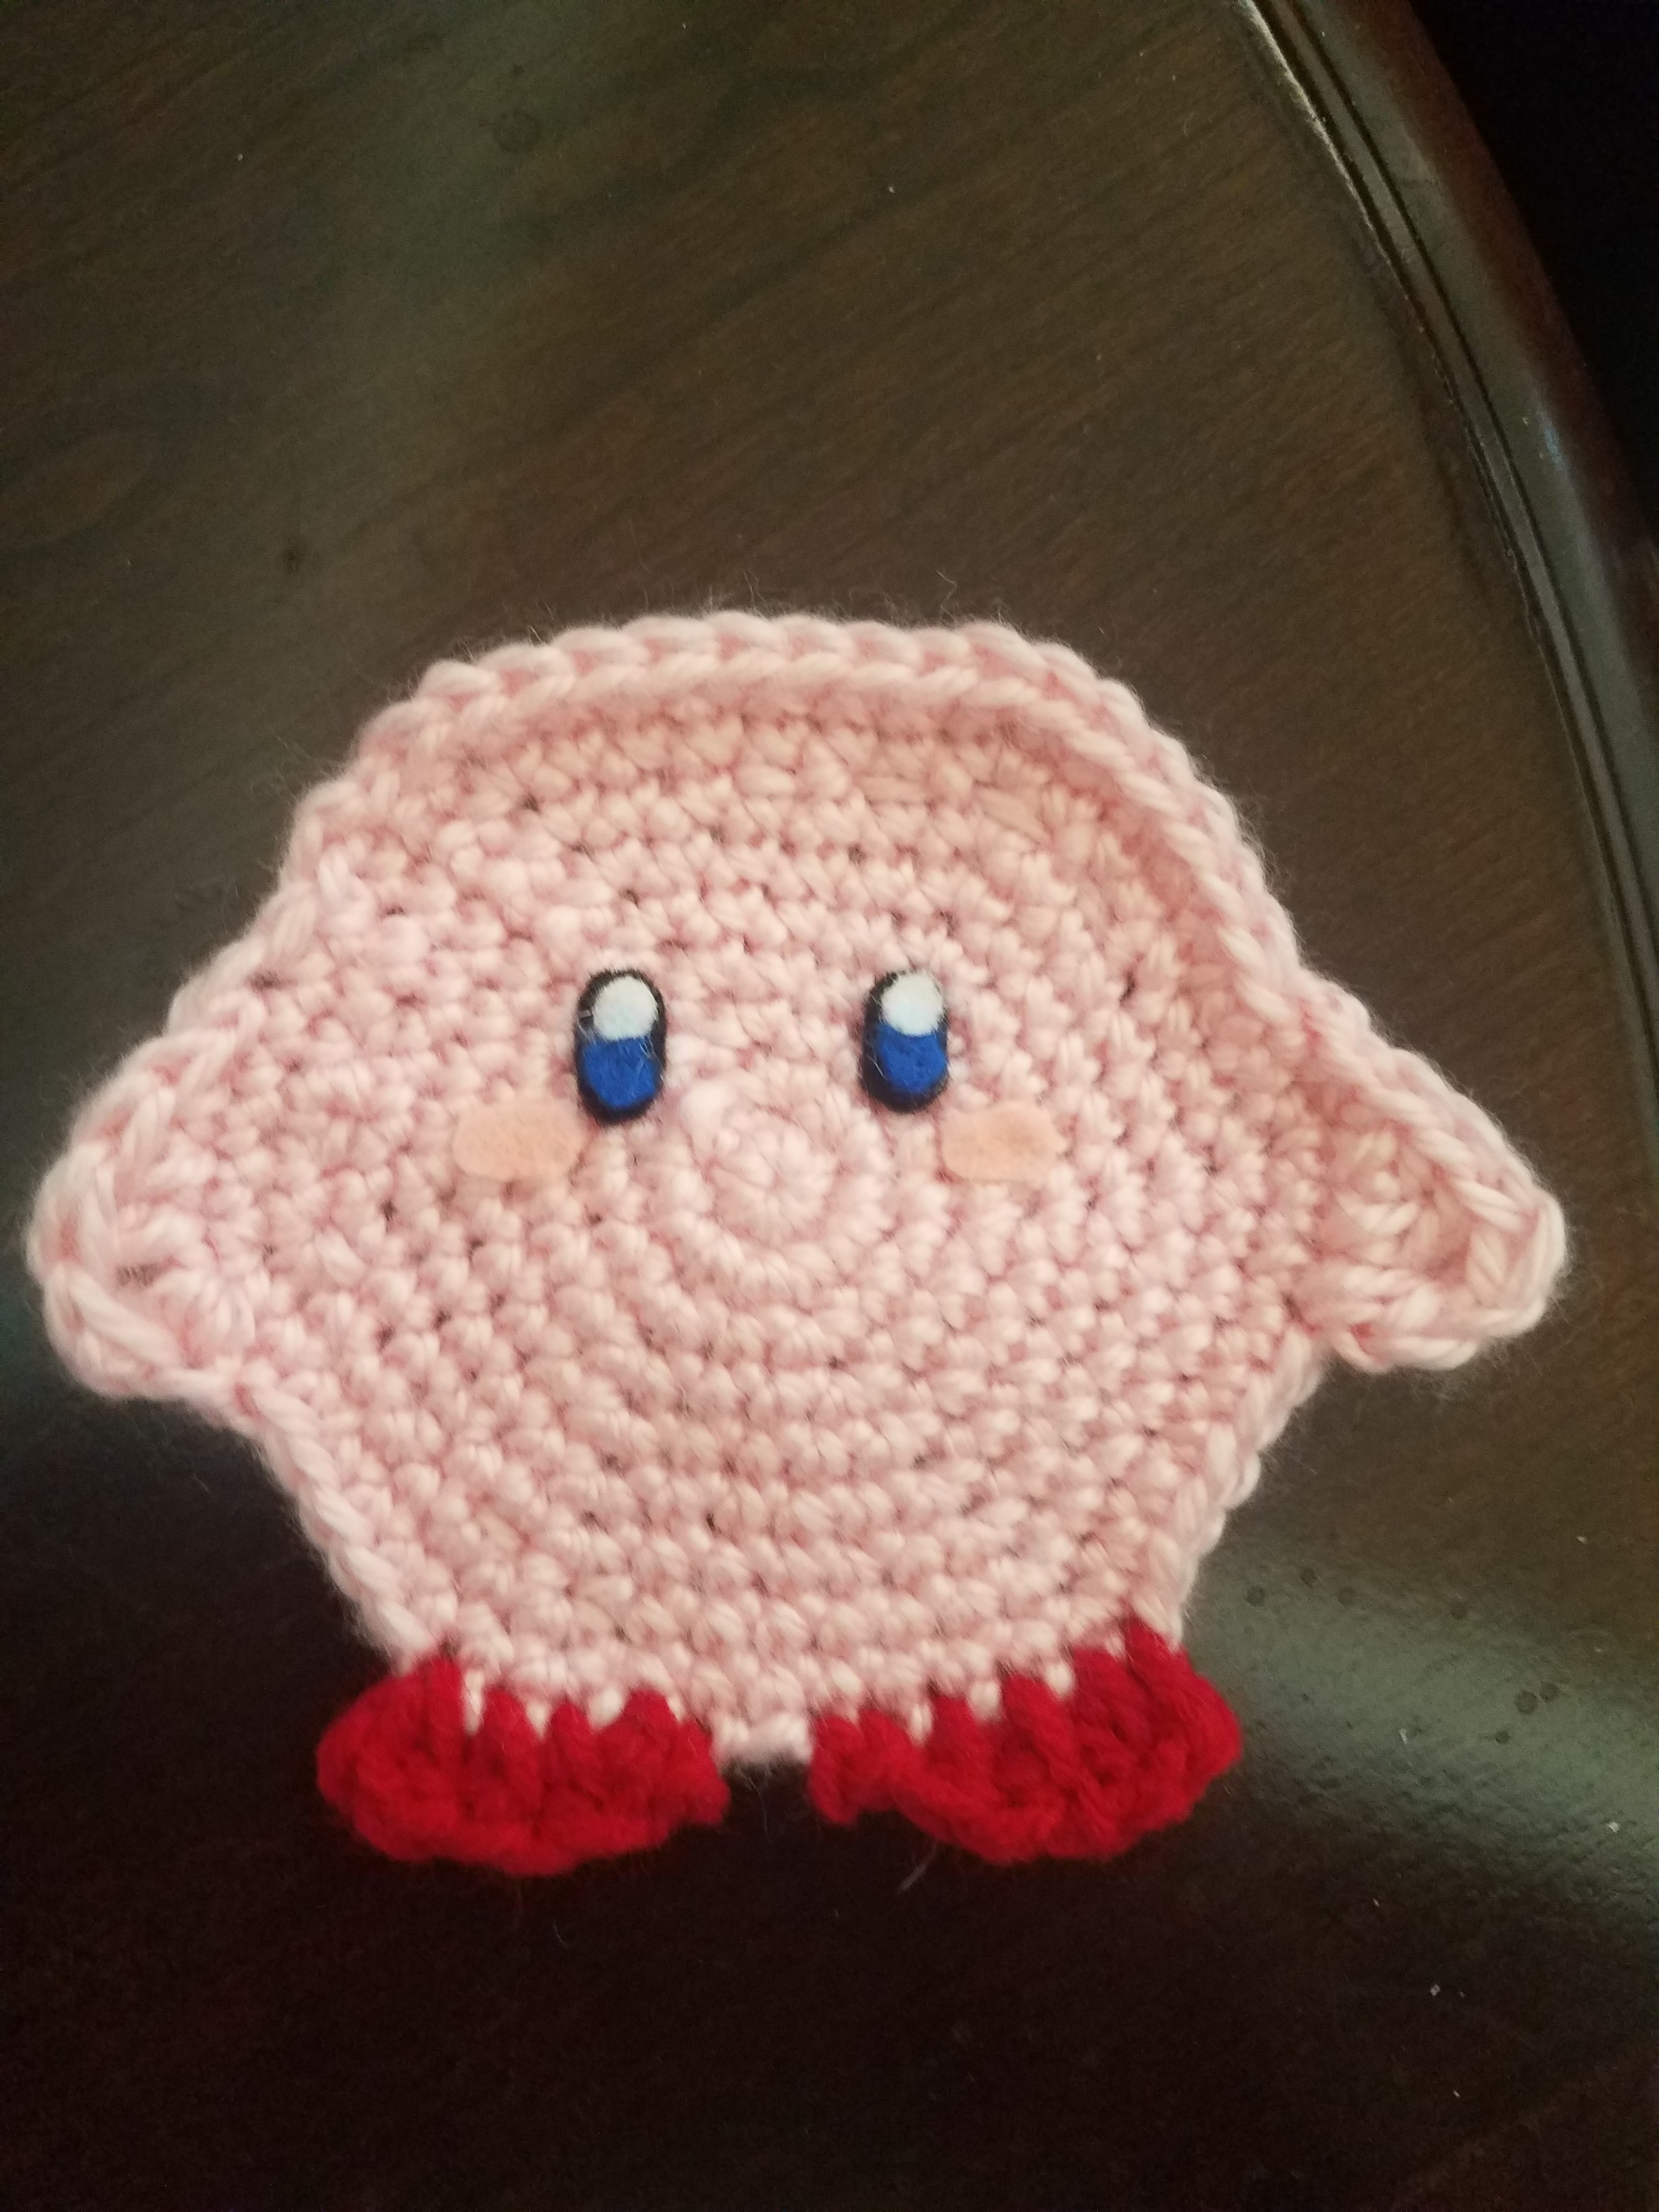
Here is the pattern for the Kirby coaster! I tried my best to explain how I attached the arms and feet, but if the written explanations don’t make sense, you can view this tutorial video!
Kirby Coaster Pattern
Materials:
Pink yarn
Red yarn
Crochet hook – I use a G hook
Felt for details (pink, black, blue, and white)
Hot glue to attach the felt details
Abbreviations:
MC = magic circle
Sc = single crochet
Dc = double crochet
Tr = triple crochet
Hdc = half double crochet
Inc = increase
Dec = decrease
Sl = slip stitch
* = repeat around
Coaster
*This pattern is worked in the round (after each round, sl to first stitch of previous round and ch 1)
With pink yarn…
R1: Sc 6 in MC (6)
R2: Inc * (12)
R3: Sc 1, inc * (18)
R4: Sc 2, inc * (24)
R5: Sc 3, inc * (30)
R6: Sc 4, inc * (36)
R7: Sc 5, inc * (42)
R8: Sc 6, inc * (48)
R9: Sc 7, inc * (54)
Finish off with a sl stitch – leave a tail to weave in the end
Arms
Pick up a stitch anywhere on the coaster circle that was just made
Ch 3, tr in same stitch, DC 1 in next, hdc 1 in next, sc 1 in next, sl 1 in next
Finish off – leave a tail to weave in the end
For the other arm, pick up a stitch on the opposite side that lines up with the top of the arm you just made:
Ch 1, sl in the same stitch, sc 1 in next, hdc 1 in next, DC 1 in next, tr 1 in next
Finish off with a sl stitch – leave a tail to weave in the end
Feet
Pick up a stitch on the bottom of the coaster circle:
Ch 2, hdc 1 in the same stitch, hdc in the next 3
Finish off with a sl stitch – leave a tail to weave in the end
For the other foot, pick up a stitch one or two stitches away from the end of the first foot, then:
Ch 1, sl in the same stitch, hdc in the next 4
Finish off without a slip stitch – leave a tail to weave in the end
Details:
Cut out two ovals of pink felt for the blush
Cut out two ovals in black, two circles in white, and two half ovals in blue for the eyes
Use hot glue to assemble the eyes
Use hot glue to attach the felt details to the coaster
And there you have it, your own Kirby coaster!
If you use this pattern and post the result on Instagram, please tag me @tokyodragon.crochet (you can also post it in the comments here)! I would love to see what you all make 😀
If you have any questions about this pattern, feel free to leave a comment!
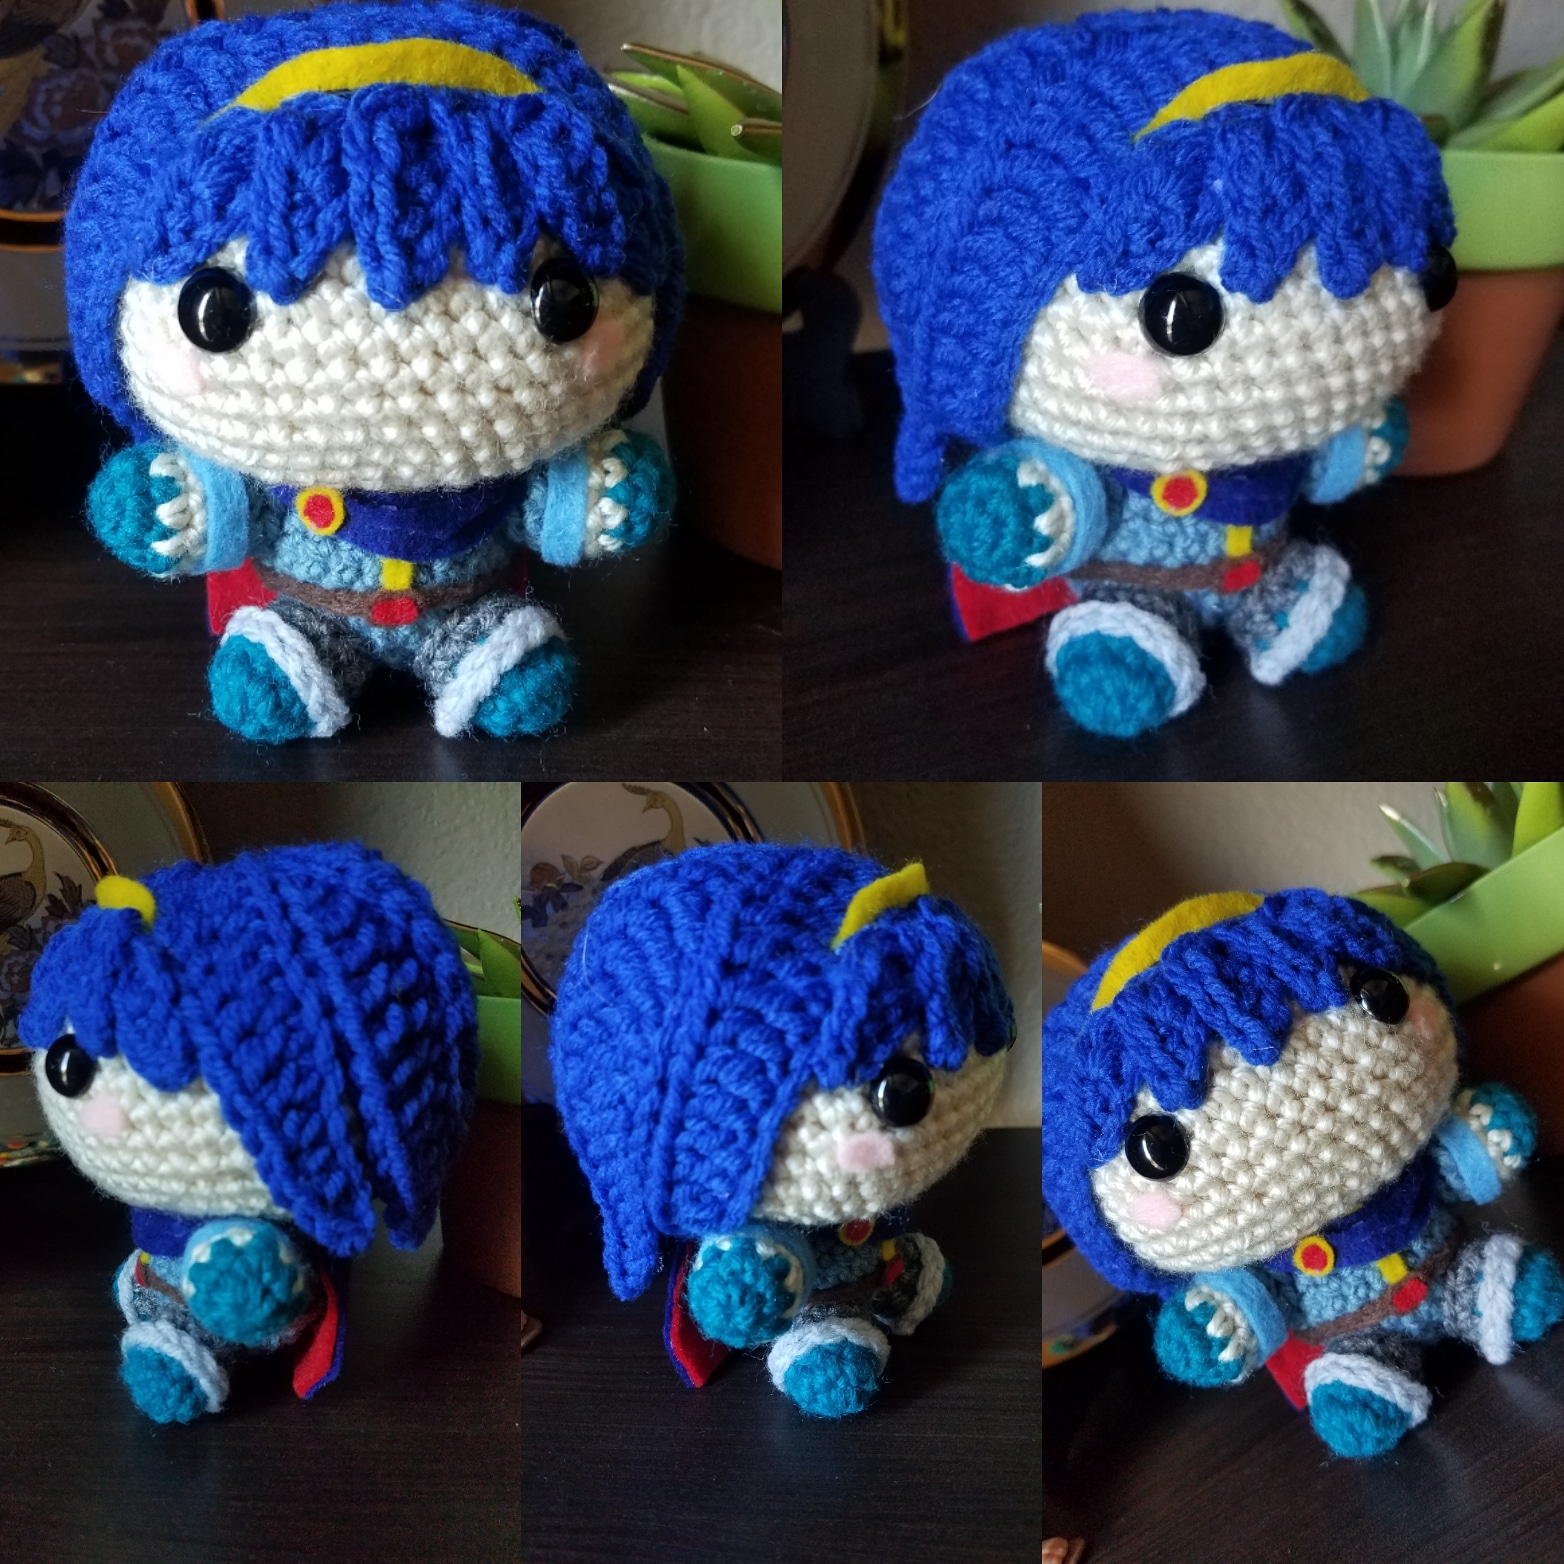
Two months of Super Smash Saturday completed! Today’s character is Marth. I love the Fire Emblem games, so I had a lot of fun with this one.
His hair didn’t turn out exactly as I had imagined, but I’m still satisfied with it. I especially love the little cape I gave him.
Next up is Mr. Game and Watch! He is the last one for this first row 🎉 I have no idea how I’m going to make him yet, so this should be interesting.
This event is a CAL/weekly challenge, so if anyone wants to join in and create your own version of Mr. Game and Watch for next Saturday you are more than welcome to! Use #supersmashtokyo to share your projects and tag me on Instagram @tokyodragon.crochet
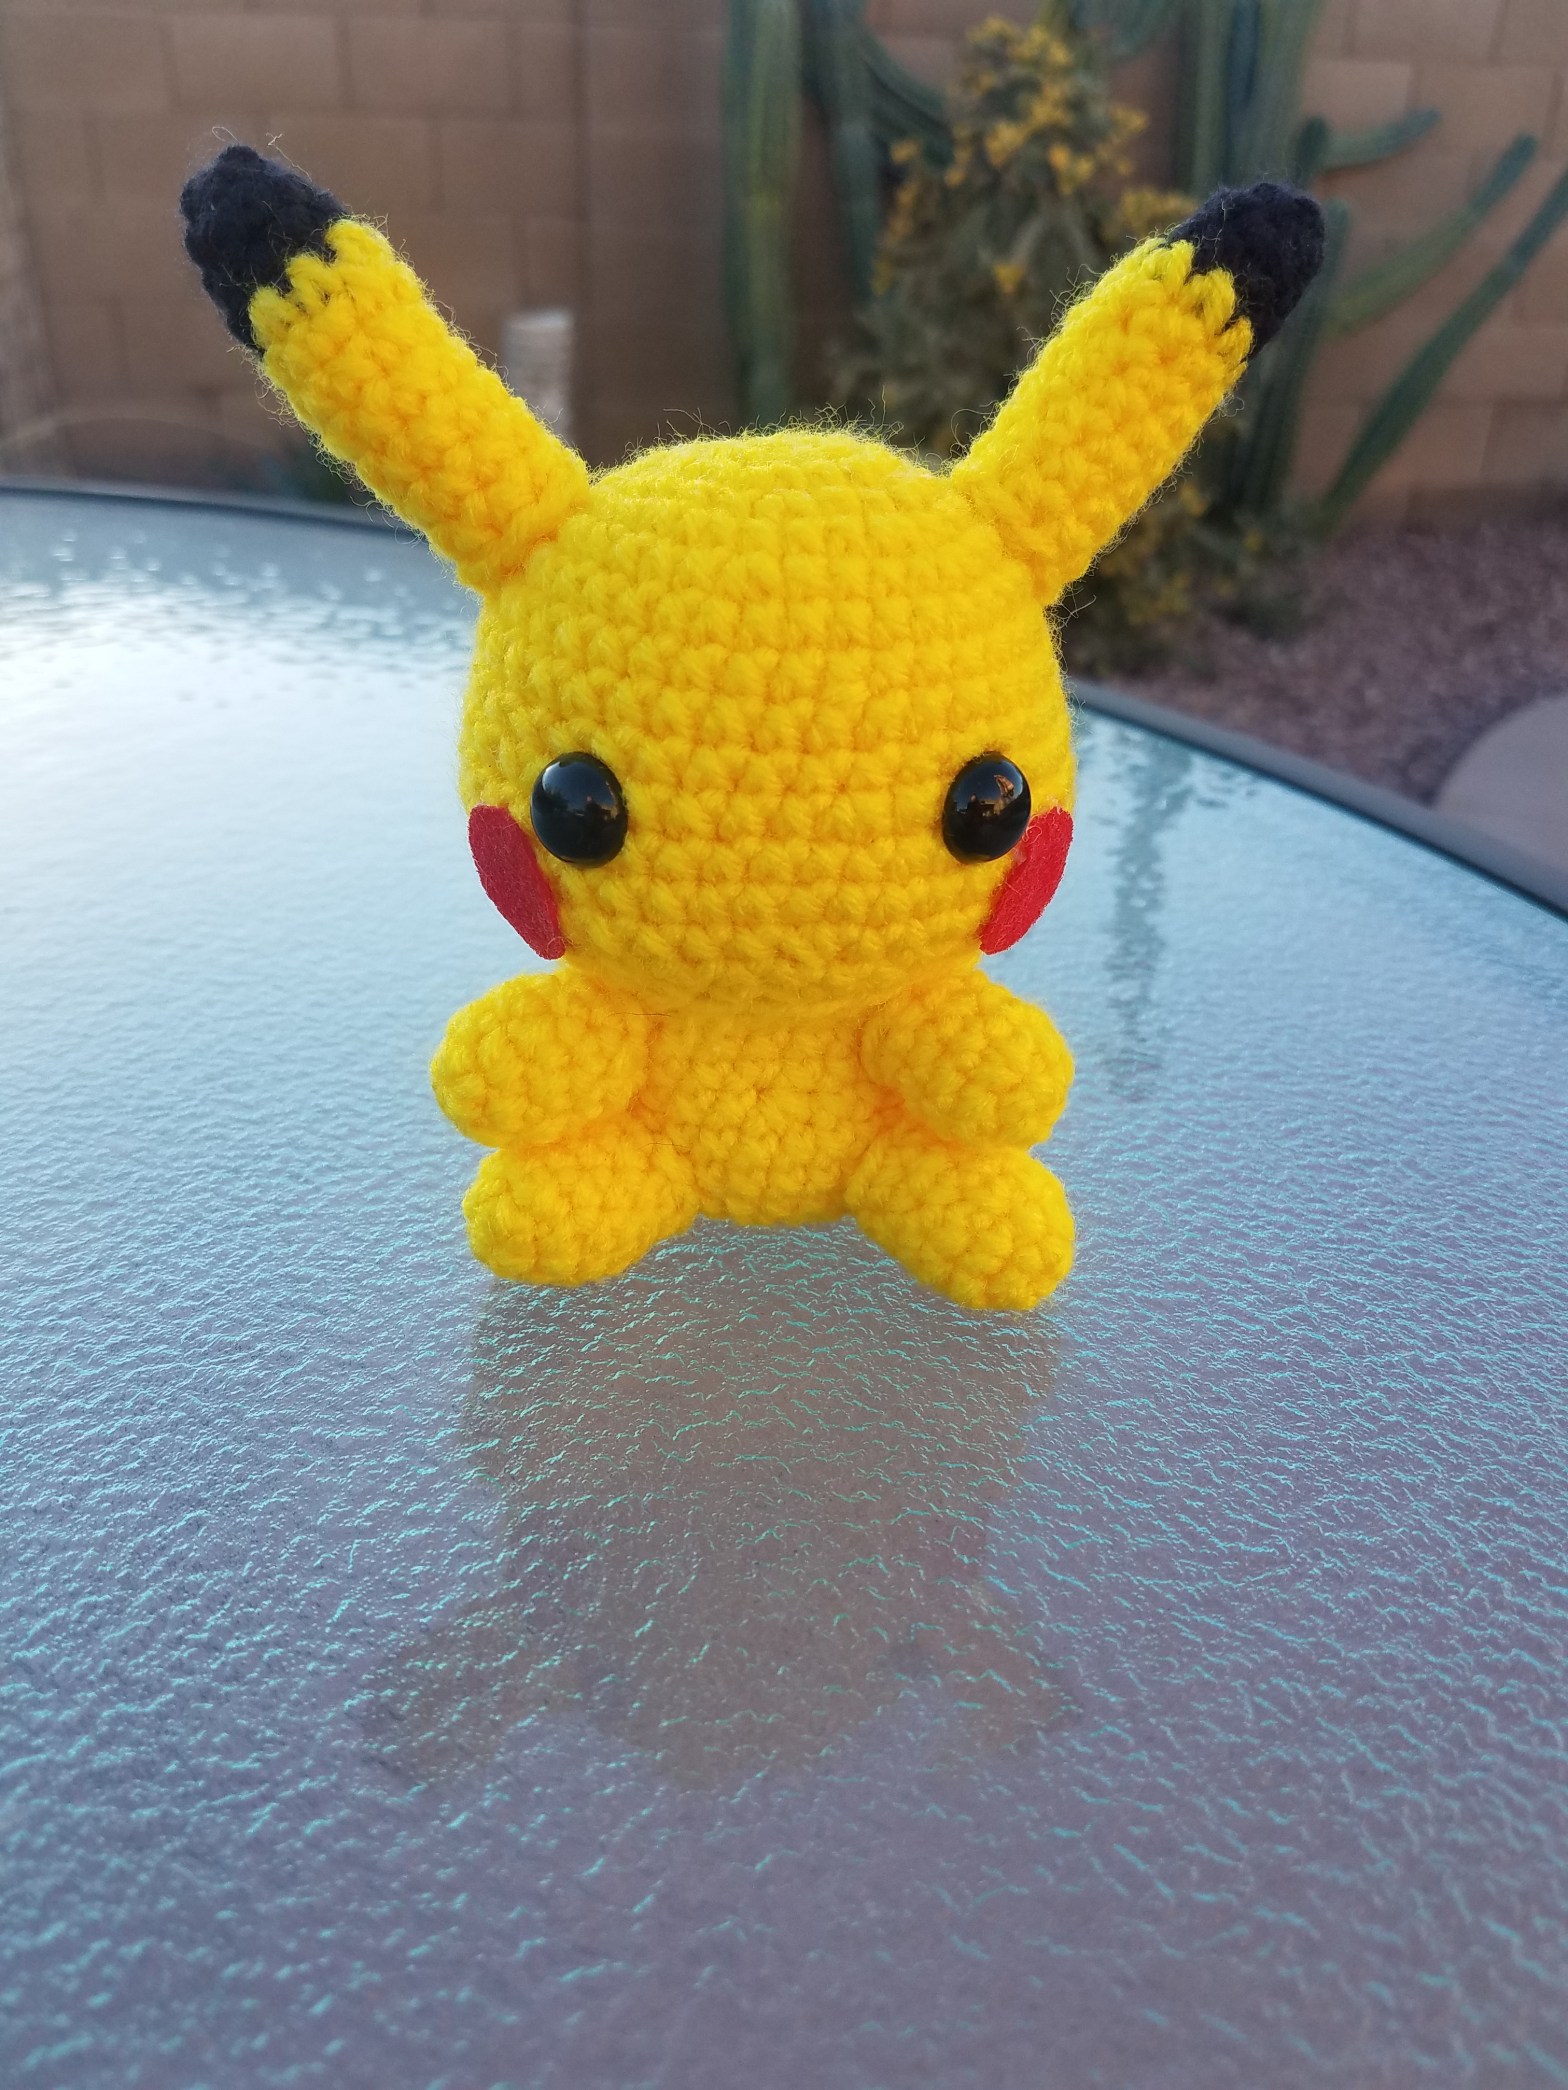
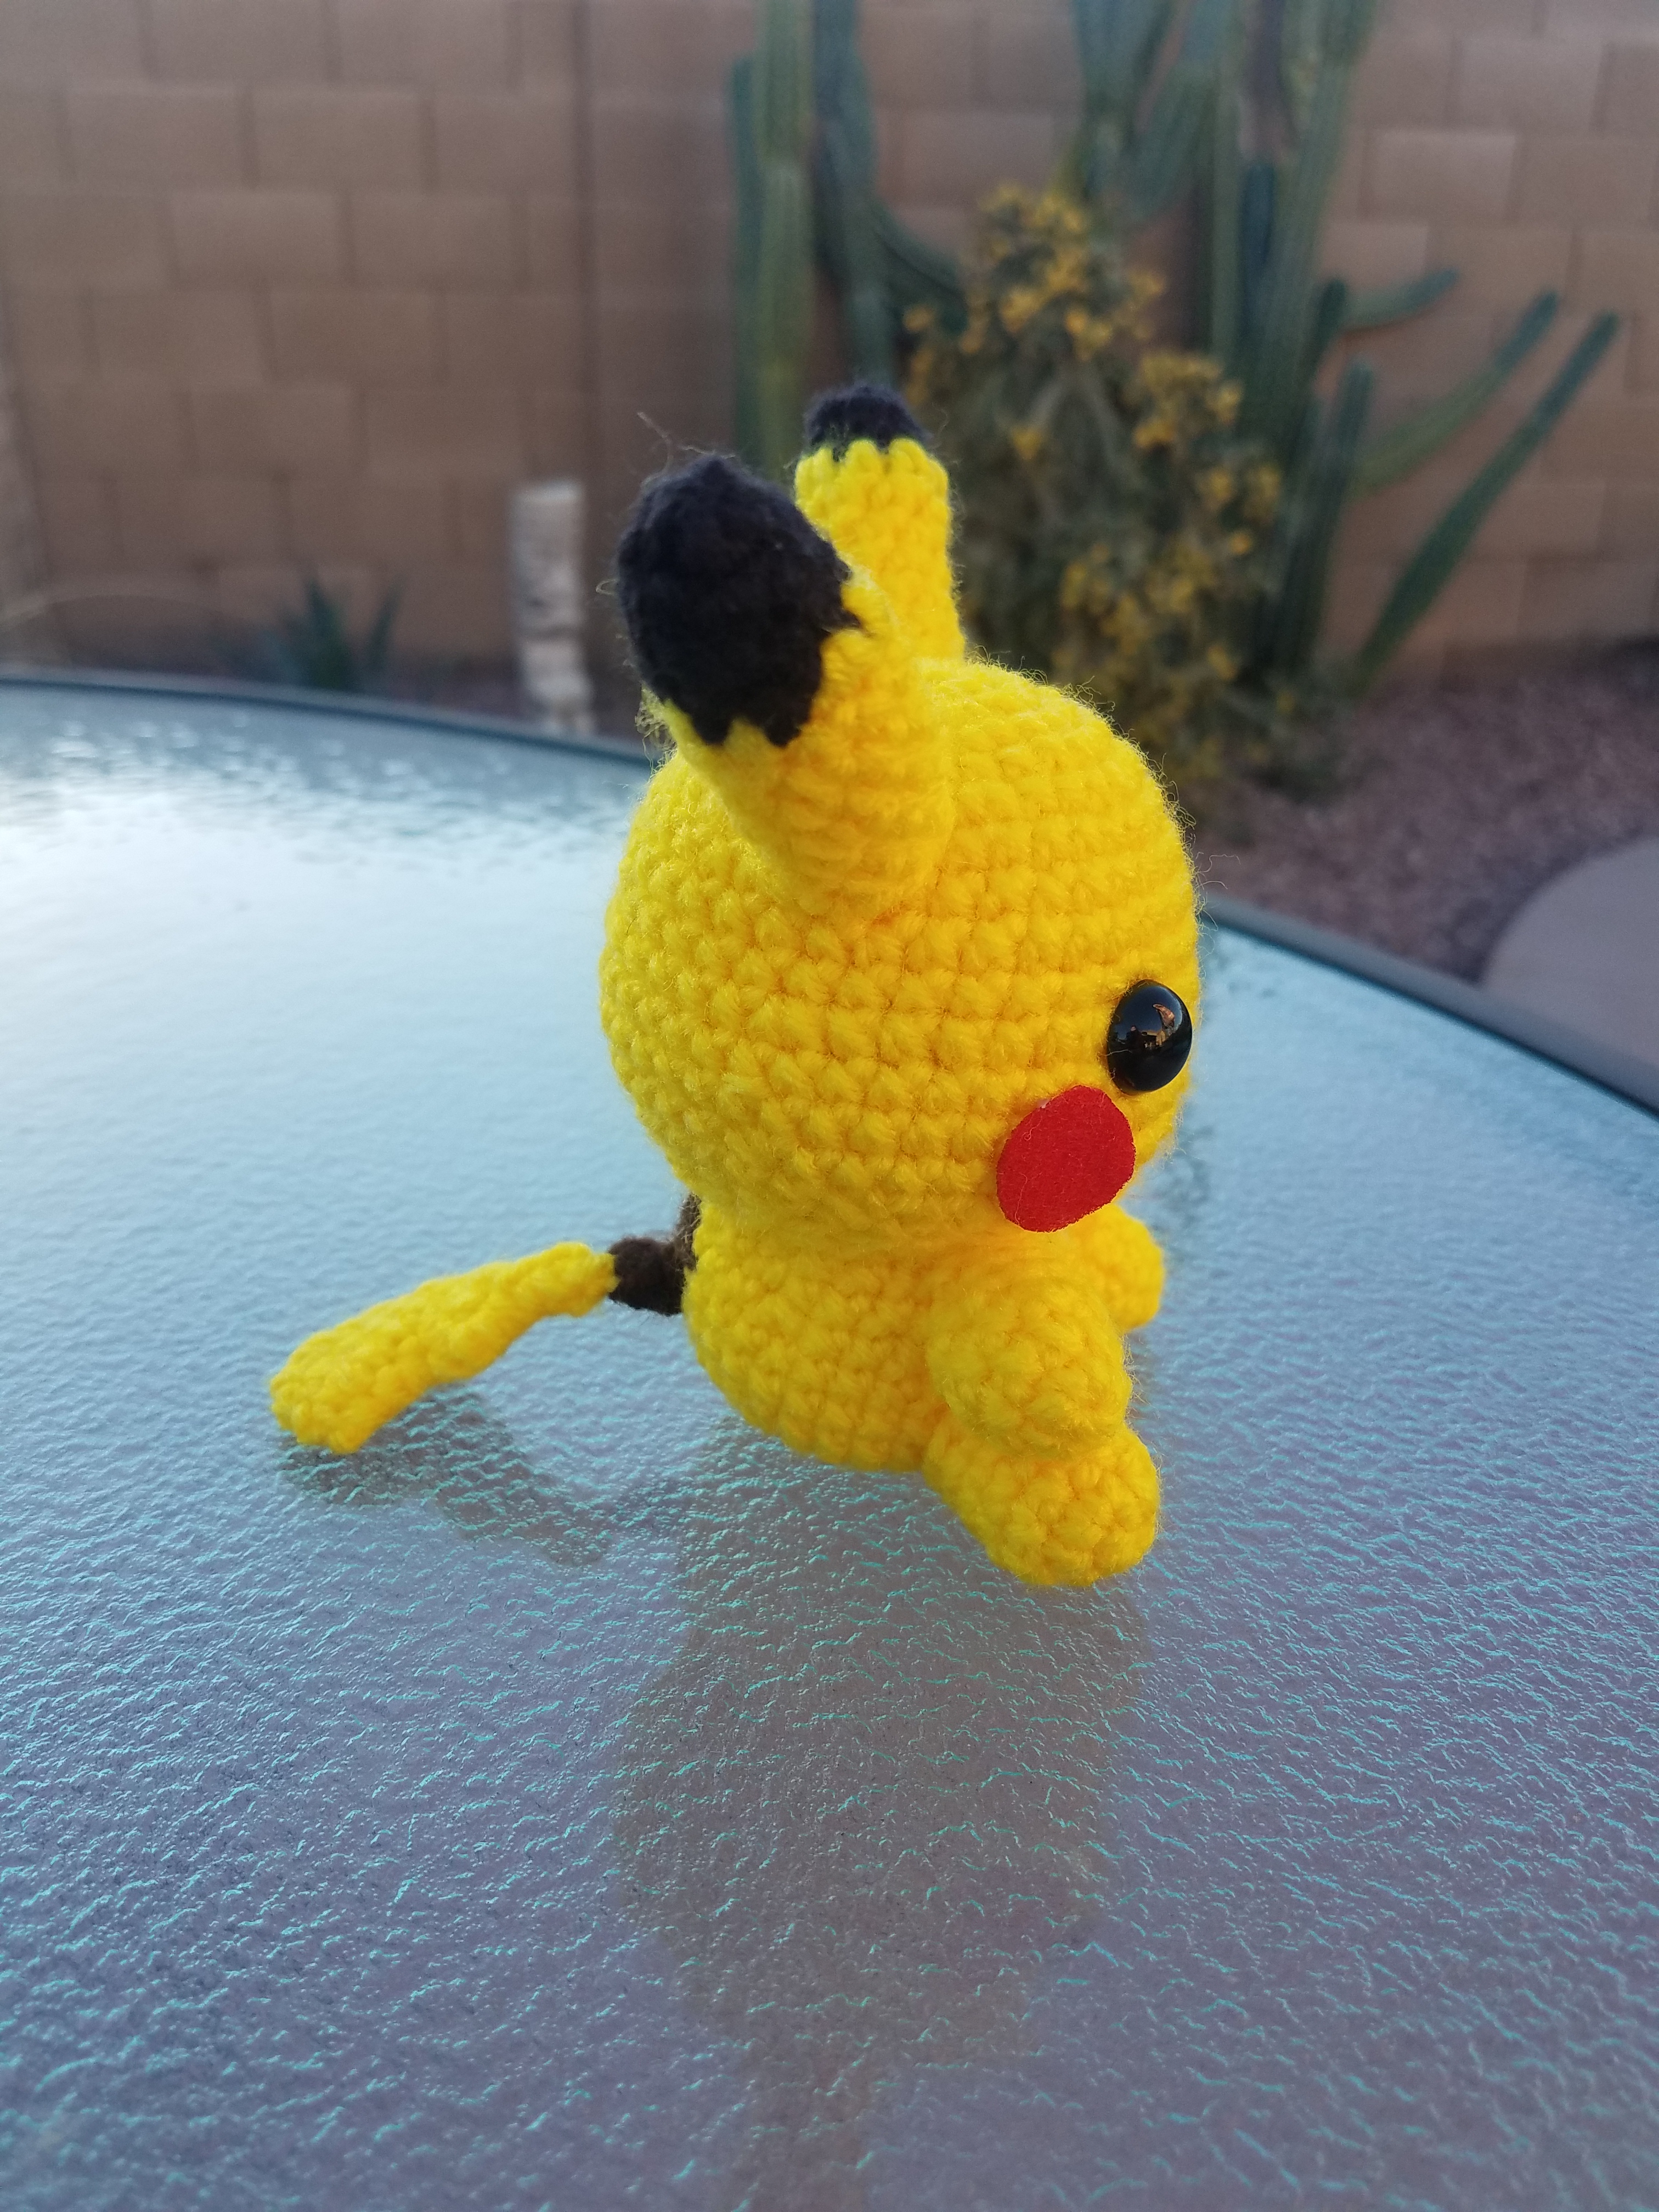
Today’s Super Smash Saturday character is Pikachu!
Next week’s character is Marth! I love the Fire Emblem games, so I’m definitely excited for next week’s character 😀
This event is a CAL/weekly challenge, so if anyone wants to join in and create your own version of Marth for next Saturday you are more than welcome to! Use #supersmashtokyo to share your projects and tag me on Instagram @tokyodragon.crochet
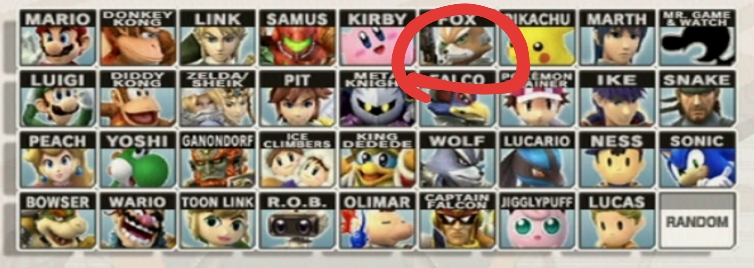
So, details! For me, the details are what makes my crochet pieces come alive and feel complete. Like Deku’s freckles, or Fox’s belt, or the Pokeball centers. Small things like that can make a huge difference in how the finished piece looks! In this post, I’ll go over some of my favorite ways to add details.
One of my go to methods for adding details is to use felt! Felt comes in all different colors, is easy to cut, and can be made into intricate shapes that are difficult to crochet. In addition, felt works great for details that are super small. To attach the felt, I use hot glue. Hot glue is like my best friend when it comes to adding details. It saves me so much time, you just have to be careful not to add too much. If you do, you might end up with the hot glue showing, which doesn’t look that great.
Another way to add details is to use fabric markers or fabric paint. It may sound like an odd choice, but it actually works really well! I use it for fun facial expressions (like on my mini octopus/takochus) and face details like scars or freckles. I’ve also used it for blush and color patterns, like my cheshire cat.
Yet another way to add details is with needle felting! I don’t use this method as often, but it comes in handy for things like eyebrows.
Lastly, I will sometimes use a colored pencil to add blush. You can also use makeup or pastels, but a colored pencil works just fine for me. It gives just a hint of color to the characters and makes them look a little sweeter.
And that about wraps it up! I think the details are what makes a character recognizable, so it’s always fun to see it come together.
Does anyone have any other methods for adding details? Share it in the comments!
Phew, the first row of characters is already almost done! I can’t believe how fast this year is flying by, does anyone else feel that way?
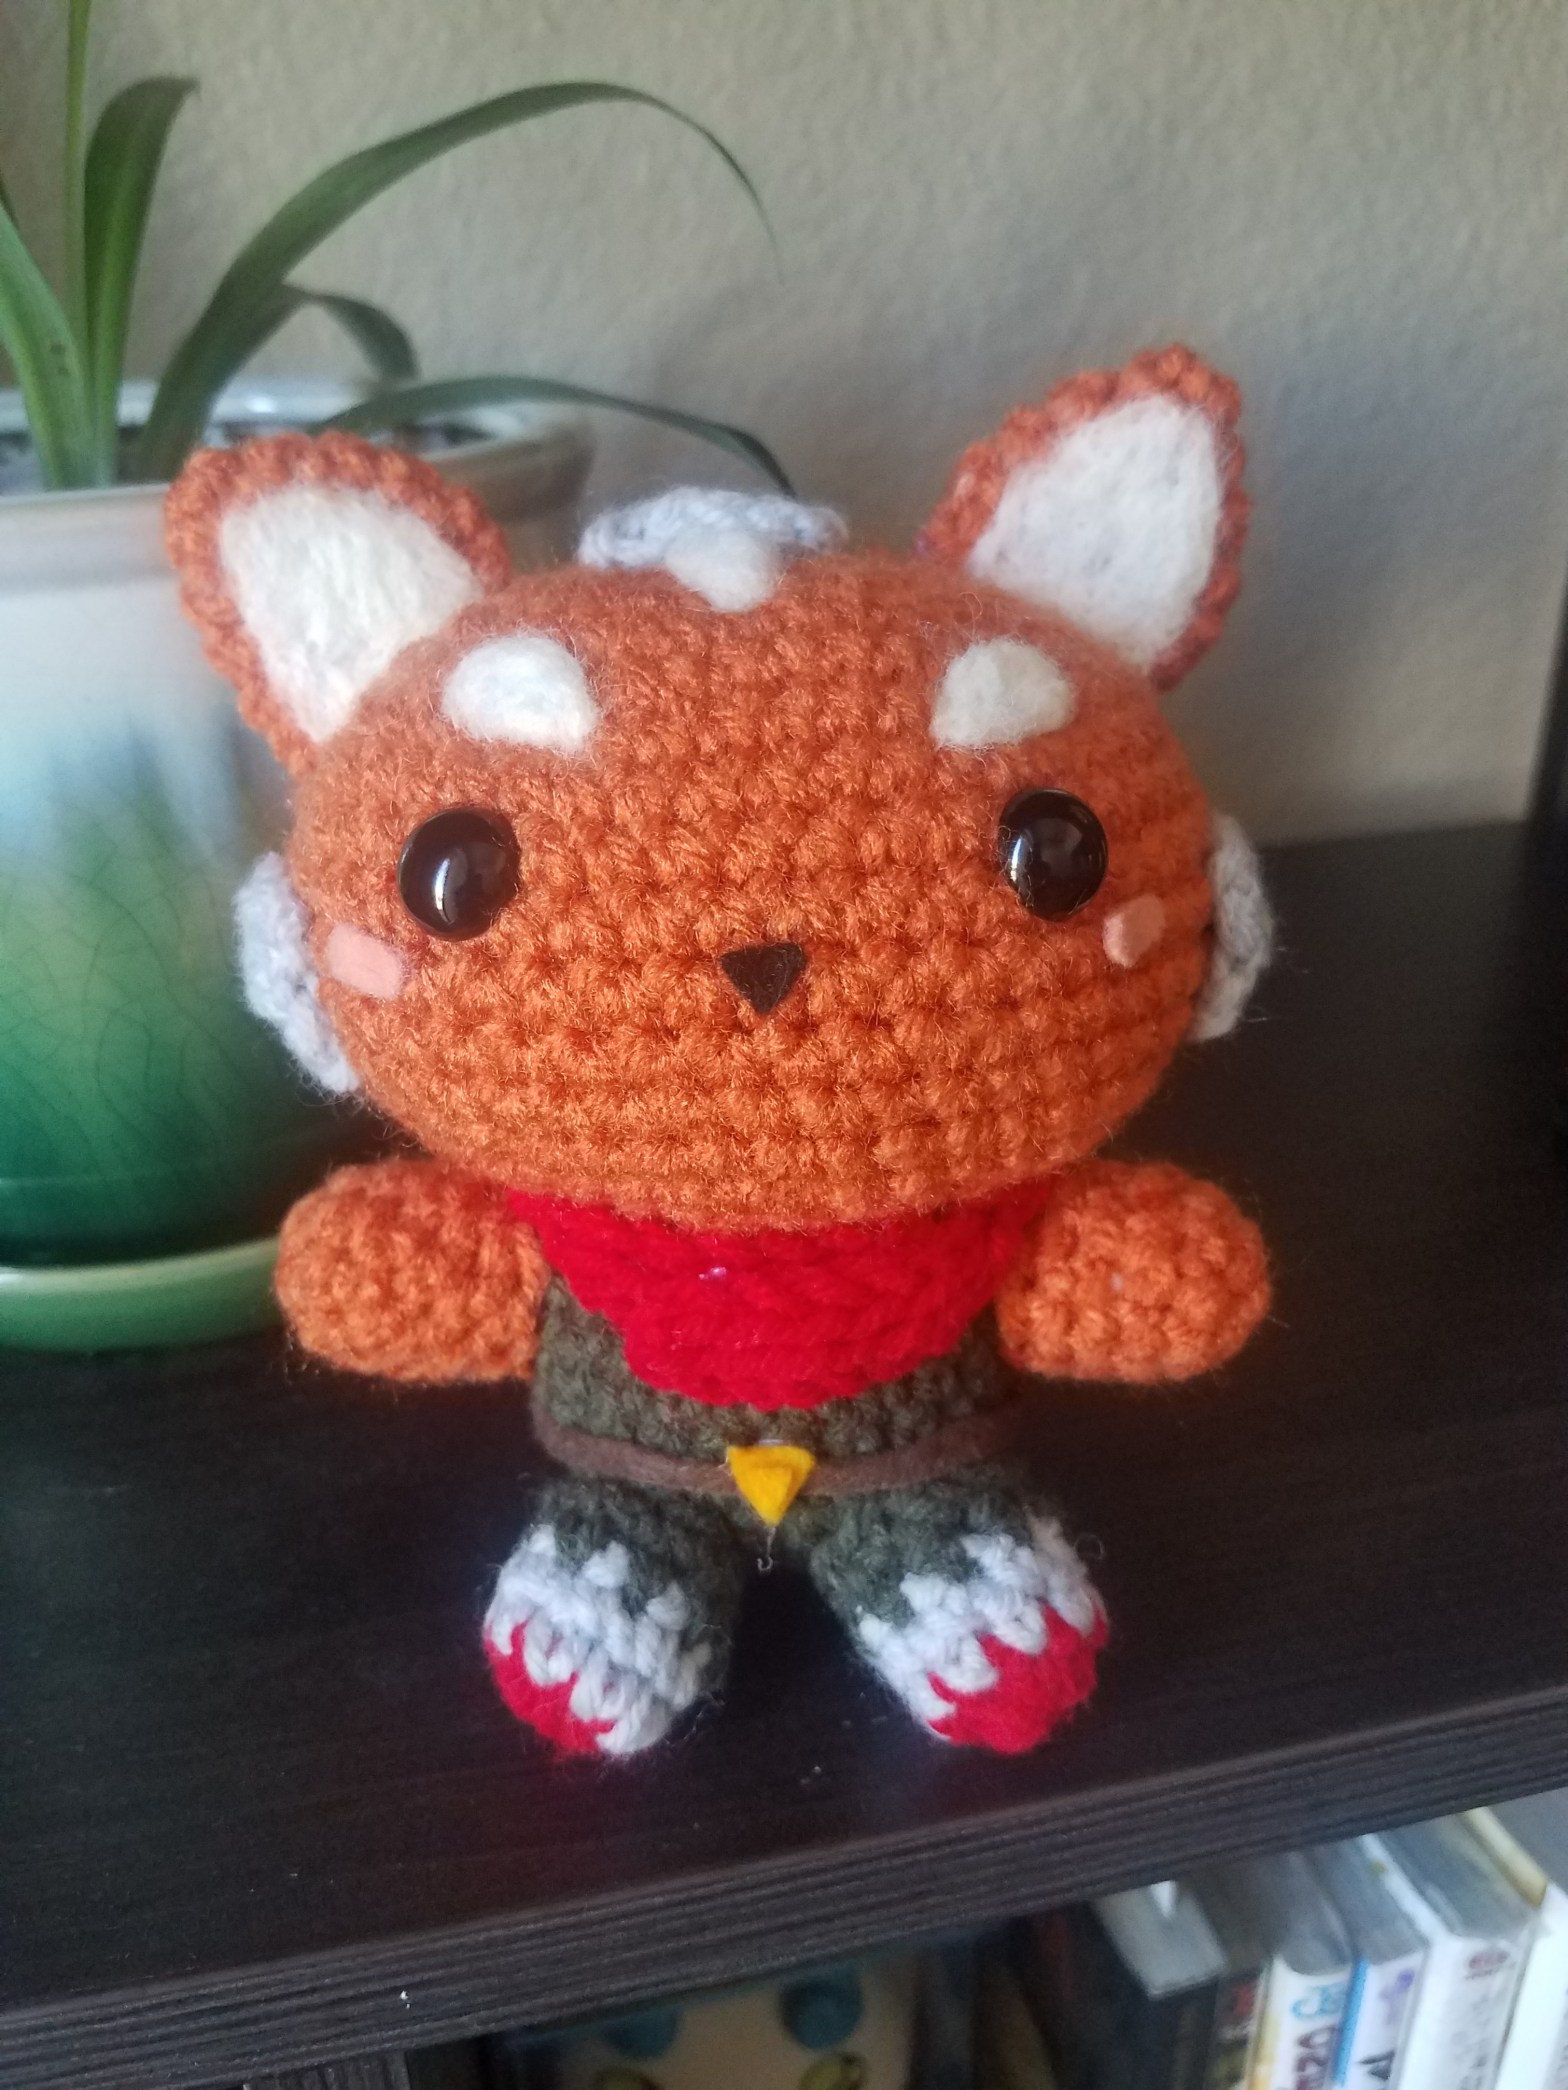
But anyway, today’s character is Fox! I didn’t have the exact color for him, but got it close enough. He reminds me a little bit of my red panda for some reason, I think it’s the eyebrows 🤔
I also decided to not make his jacket, I liked how he looked without it.
Next up is Pikachu!
This event is a CAL/weekly challenge, so if anyone wants to join in and create your own version of Pikachu for next Saturday you are more than welcome to! Use #supersmashtokyo to share your projects and tag me on Instagram @tokyodragon.crochet
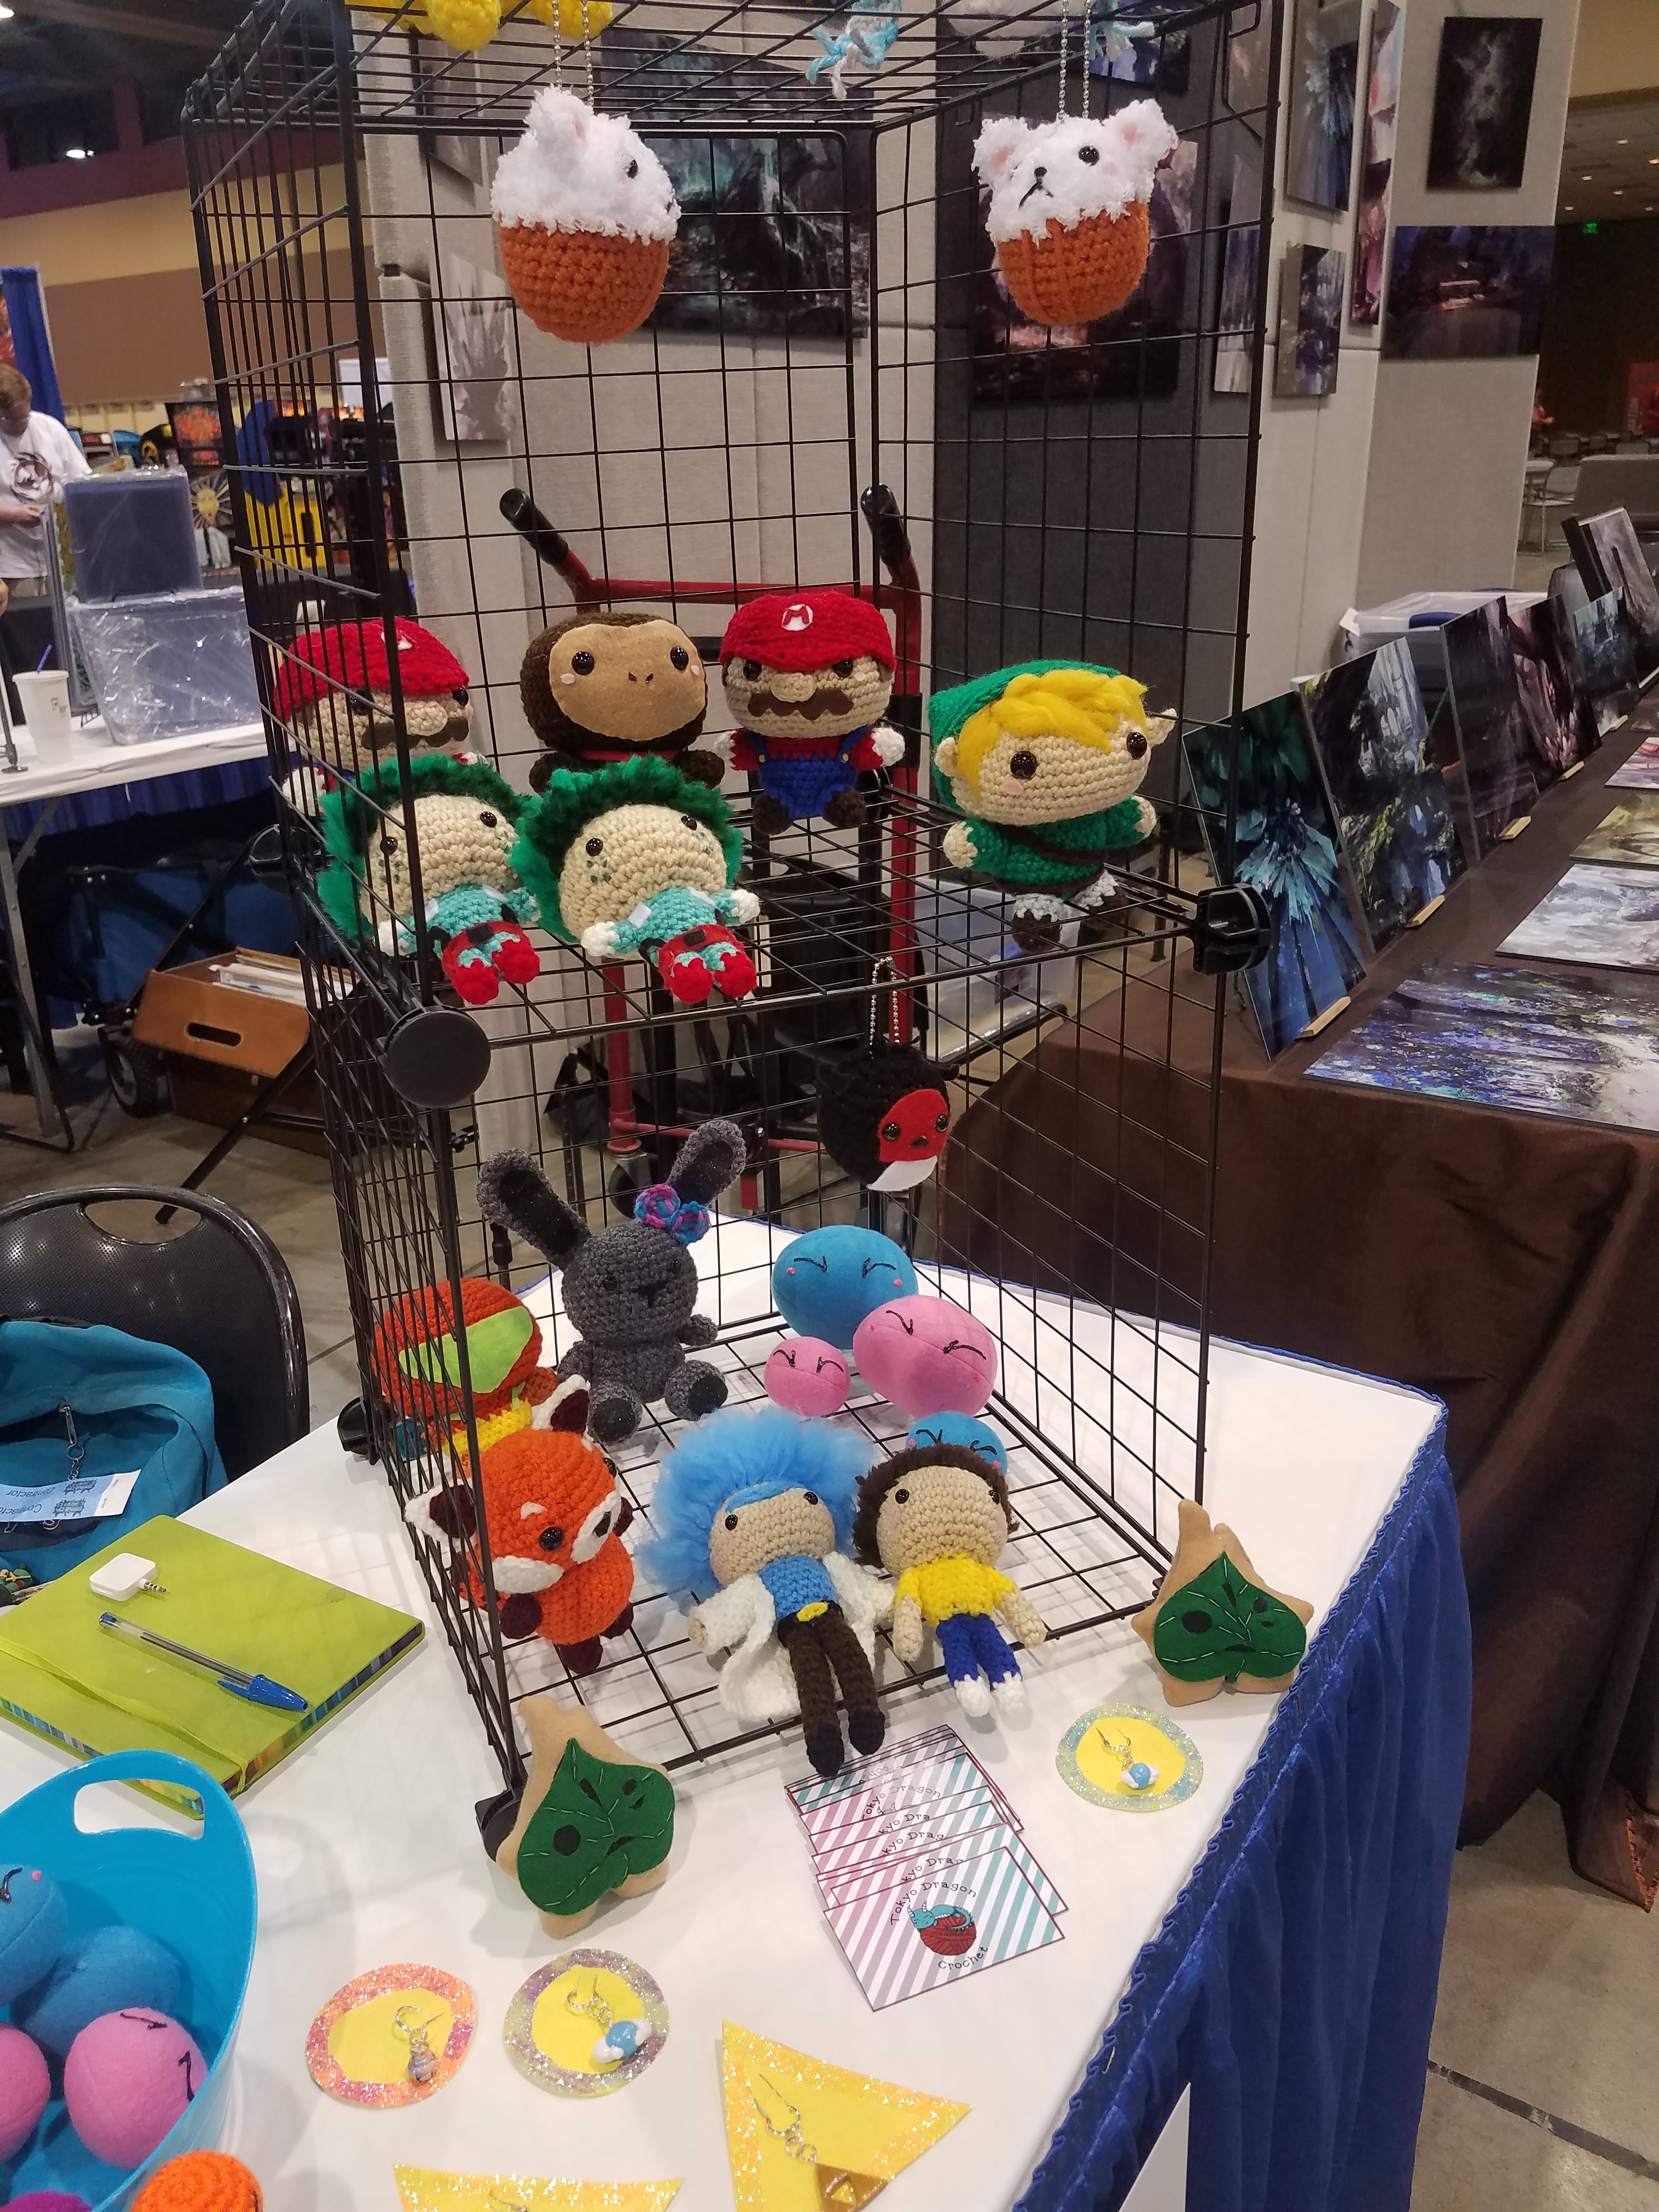
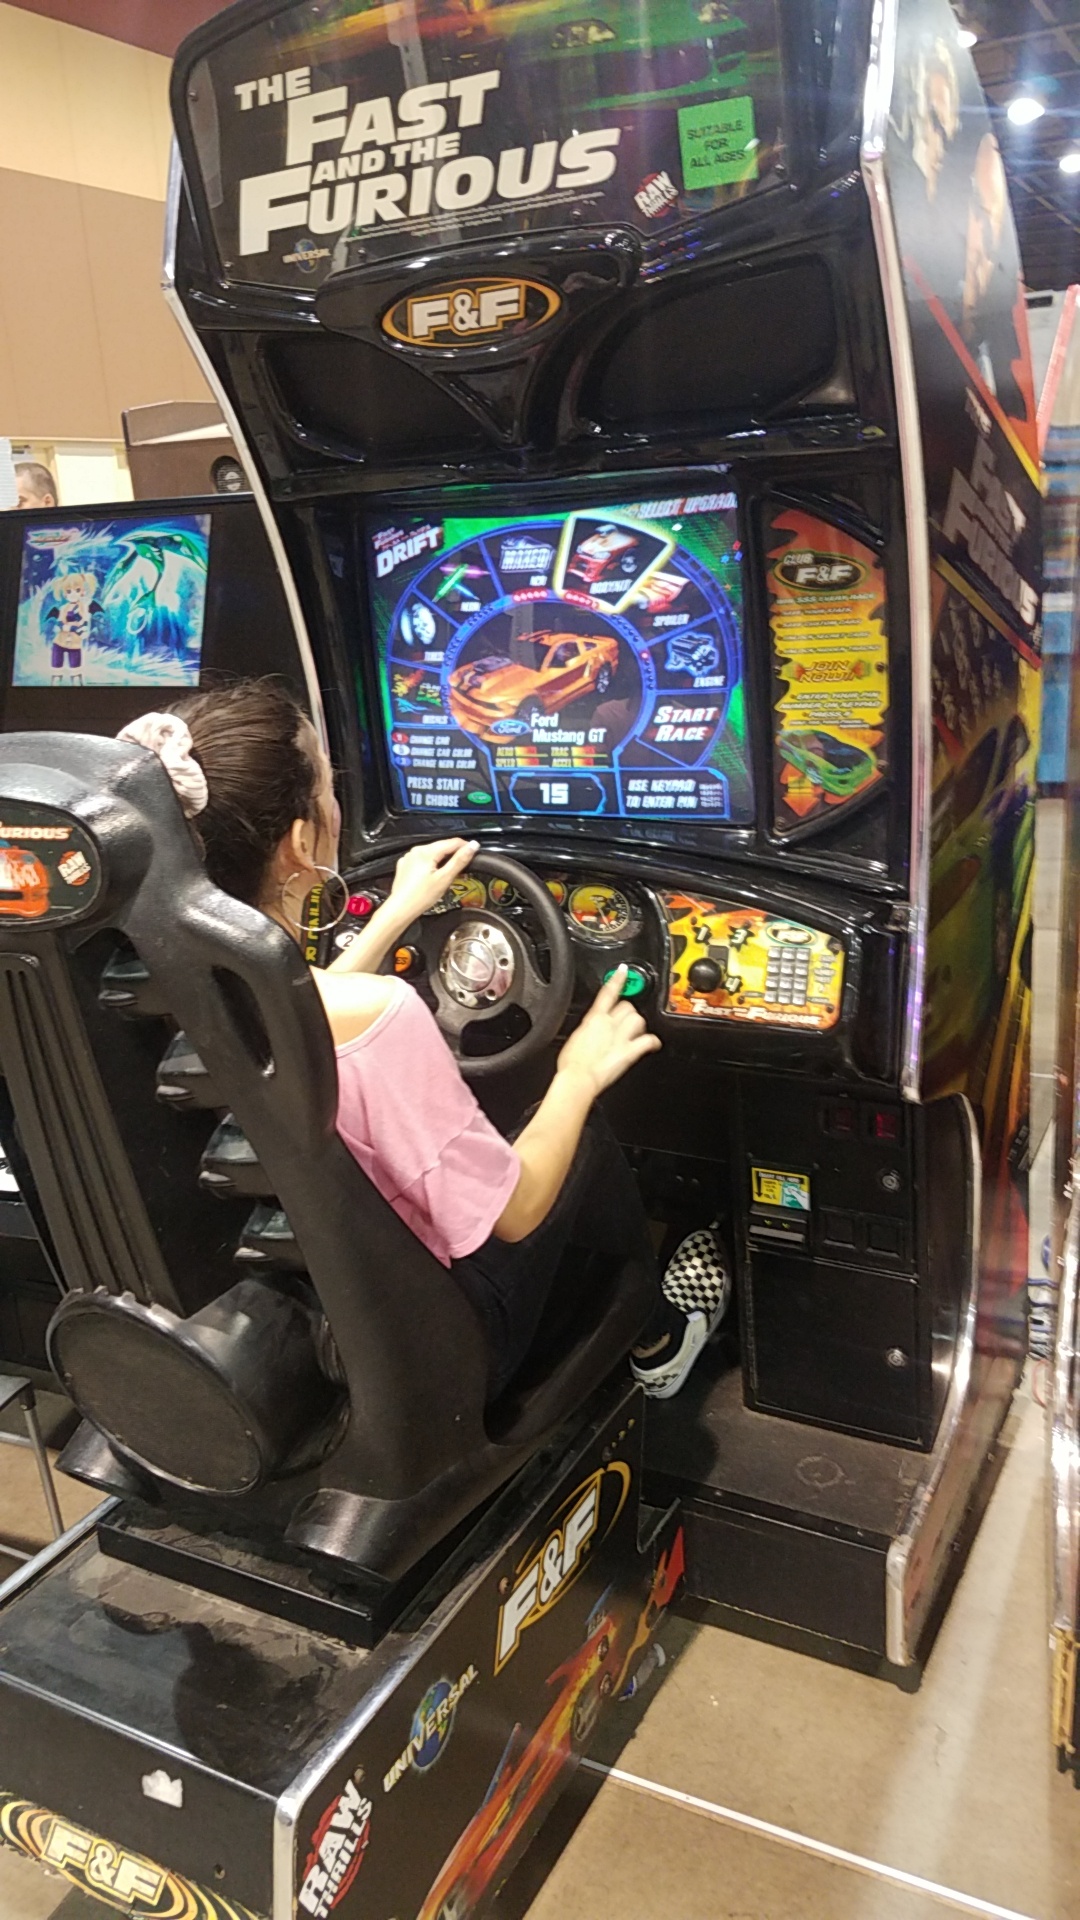
This past weekend I attended Game On Expo as a vendor! It was my first time at this convention, and I will definitely be attending next year as well. It was tons of fun; I got to meet some cool new people and play old school arcade games.
With each convention I go to, I learn a little more about how to improve. From learning what sells, what to add to my inventory, how to better display my crochet, and more! As they say, practice makes perfect 👌
Next up is Tucson Comicon in November, and I’ll be plenty busy restocking and making new items until then!
Here are some pictures from the weekend:
Table setup Table setupGlaceon and Umbreon hoodies I made for me and my sister to wear. It kept us warm when the vendor hall got cold ❄Fast and the Furious arcade game! They had a ton of games, like Pacman, Mortal Kombat, Street Fighter, and RampageThe last day of the expo, rocking my casual Link cosplay 🍃
This Saturday, it’s Kirby! I’ll admit, it was kind of a rush job since I’ve been preparing for Game On Expo all week and am attending the expo this weekend. But! I didn’t want to skip a week of Super Smash Saturday. So, the solution was to make something simple and quick: and thus the Kirby coaster was born, ready to hold all of your drinks with his massive appetite 😆
I may also release the pattern for this Kirby coaster 🤔
Next up on the roster is Fox 🦊
This event is a CAL/weekly challenge, so if anyone wants to join in and create your own version of Fox for next Saturday you are more than welcome to! Use #supersmashtokyo to share your projects and tag me on Instagram @tokyodragon.crochet
These takochus are not only fun to say, they’re fun to make! They are so easily customizable, and each one has it’s own personality.
This is also a really good pattern to use up small scraps of yarn that are too small for larger projects 🙂
Takochu Pattern
Materials:
1 yarn color for the body and tentacles
1 contrasting yarn color for the mouth
Stuffing
8mm safety eyes
Hook size – G & E hooks (1 larger and 1 smaller)
Hot glue gun (optional)
Fabric paint (optional)
Abbreviations:
MC = magic circle
Sc = single crochet
Dc = double crochet
Inc = increase
Dec = decrease
Sl = slip stitch
* = repeat around
Body:
Using the G hook & in the yarn color of your choice…
R1: Sc 8 in MC (8)
R2: Inc * (16)
R3: Sc 1, inc * (24)
R4: Sc around (24)
R5: Sc around (24)
R6: Sc around (24)
R7: Sc around (24)
R8: Sc 1, dec * (16)
Place the 8mm safety eyes between rounds 5 & 6, about 5 stitches apart – stuff!
R9: Dec * (8)
Finish off with a sl stitch – leave a tail to sew the opening closed
Tentacles:
Using the E hook & in the yarn color of your choice…
R1: Sc 8 in MC (8)
R2: Dc 4 in the next stitch, sl in next * (You should end up with 4 “shells” or “tentacles”)
Finish off – you can either leave a tail to sew on, or cut it short and hot glue it to the body
Mouth:
Using the E hook & in the contrasting color…
Ch 6, use a slip stitch to join the first and last stitches together, creating a circle
Finish off – you can either leave a tail to sew on, or cut it short and hot glue it to the body
Details:
You can use fabric paint to create different faces! >.<
Hot glue can be used to attach the pieces together – personally I find this easier (and faster) than sewing the pieces together
These takochu are super customizable, so mixing up the colors in all different combinations is super fun!
If you use this pattern and post the result on Instagram, please tag me @tokyodragon.crochet (you can also post it in the comments here)! I would love to see what you all make 😀
If you have any questions about this pattern, feel free to leave a comment!